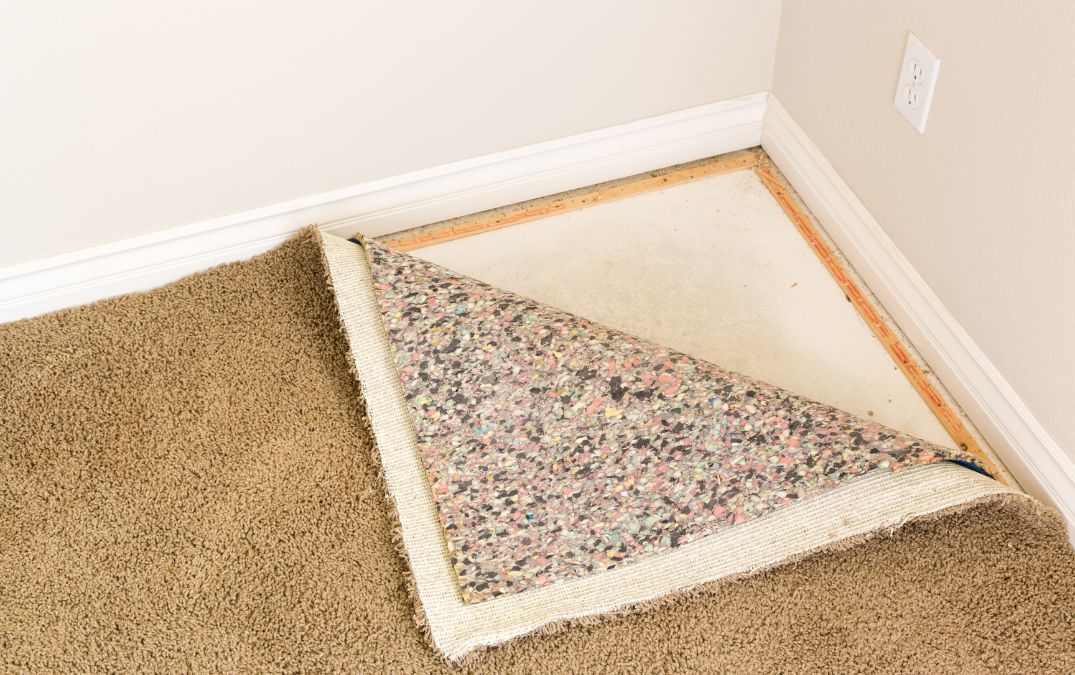
Getting your concrete floor ready for carpet installation is all about ensuring a smooth, clean surface. Start by thoroughly cleaning the concrete. Sweep up any debris and then mop the floor to remove dust and dirt. If there are any stains or grease spots, use a degreaser to get rid of them, as these can affect the adhesion of the carpet. Once the floor is clean, check for any cracks or uneven areas. Small cracks can be filled with a concrete patching compound, while larger ones might need more extensive repair. Use a leveling compound if there are significant dips or bumps to create a flat, even surface. Make sure the floor is completely dry before moving on to the next steps. Moisture can be a big problem when installing carpet on concrete, so it’s very important to test for any residual dampness. You can use a moisture meter for this, or simply tape a plastic sheet to the floor and check for condensation after 24 hours. If there’s any moisture, you’ll need to address this before laying down your carpet, possibly with a moisture barrier or sealant.
When it comes to choosing the right carpet for your concrete floor, you want to focus on durability and moisture resistance. Concrete can be a cold and sometimes damp surface, so opting for a carpet with a moisture resistant backing is a smart move. Look for carpets specifically designed for basements or other areas with potential moisture issues. Synthetic fibers like nylon or polyester are good choices because they’re resilient and less likely to harbour mold or mildew compared to natural fibers. You also want to consider the pile of the carpet. Low pile carpets are typically more durable and easier to clean, making them a great option for busy areas. On the other hand, if comfort is your top priority, a thicker, plush carpet might be more appealing. Just ensure it’s suitable for installation over concrete. Don't forget about the padding. A good quality carpet pad can add comfort, improve insulation, and extend the life of your carpet, so choose one that’s suitable for use on concrete floors.
You’ll need a utility knife for cutting the carpet and padding to size. A tape measure is needed for getting accurate measurements of your floor space and carpet pieces. You’ll also need a straightedge or a carpet ruler to guide your cuts and ensure they are straight and precise. For securing the carpet, there are two primary methods: adhesive and tack strips. A notched trowel will help you spread the adhesive evenly across the floor. For tack strip installation, you’ll need a hammer and masonry nails to attach the strips around the perimeter of the room. Tack strips should be placed about half an inch from the walls to hold the carpet edges securely in place.
Next, you’ll need a carpet stretcher or knee kicker to ensure the carpet is laid tight and flat without wrinkles. A carpet seam roller is essential if you have to join multiple pieces of carpet. It presses the seams down and blends them into the surrounding carpet for a smooth, cohesive look. Don’t forget about the carpet padding. Quality padding adds comfort and extends the life of your carpet by absorbing impact and reducing wear. You’ll need to cut the padding to size and secure it with tape or staples. Make sure the padding is smooth and fits snugly against the tack strips if you’re using them.
For finishing touches, a carpet trimmer will help you trim excess carpet along the walls for a neat, professional look.
Start off by laying down the carpet padding. This padding adds comfort and extends the life of your carpet by absorbing impact and reducing wear. Roll out the padding over the concrete floor, cutting it to fit the room. Make sure the edges of the padding are snug against the walls, and use tape to secure any seams where pieces of padding meet. If you’re using tack strips, install them around the perimeter of the room, leaving a half inch gap between the strip and the wall.
Now it’s time to lay the carpet. Unroll your carpet and spread it out over the padding, allowing it to extend a few inches up the walls. If the room is large and you need to join multiple pieces of carpet, this is where your seaming skills come into play. Place seaming tape underneath the edges where the pieces meet and use a seam iron to activate the adhesive, pressing the edges together with a seam roller for a smooth finish.
Once the carpet is laid out, use a carpet stretcher or knee kicker to stretch the carpet across the room. This step is crucial for eliminating any wrinkles and ensuring a tight fit. Start in the centre of the room and work your way out towards the edges, pressing the carpet into the tack strips along the walls. Use the knee kicker to snug the carpet into corners and against the walls.
After the carpet is stretched and secured, it’s time to trim the excess material. Use a carpet trimmer to carefully cut along the edges, ensuring a neat and precise finish. Press the trimmed edges into the gap between the tack strips and the wall using a stair tool for a professional look.
Finally, give the entire carpet a good vacuuming to remove any loose fibers and dirt from the installation process. Inspect your work to ensure the carpet is tight and flat with no visible seams or wrinkles. By following these steps meticulously, you'll have a beautifully laid carpet that’s ready to provide comfort and style to your space.
Our team of experts is ready to transform your room with precision and craftsmanship. Don't settle for ordinary when you can have exceptional. Contact us now for concrete flooring in the UK by emailing us at info@britishconcretepolishing.co.uk or by filling in the form below and our team will get back to you shortly.