How to lay laminate flooring on concrete

Contact

Preparing the concrete floor to lay laminate

First up, give your concrete floor a good once-over. Look out for any cracks. Small hairline ones? Not a big deal. But if you see anything more prominent, you’ll need to sort that out. Cracks can mess with the stability of your laminate and might even lead to future problems.

Next, moisture. Concrete can hold onto moisture like a sponge, and that’s bad news for laminate flooring. Get yourself a moisture meter and check for any damp spots. If the reading’s high, you’ve got to tackle that moisture issue before you go any further. No one wants their brand-new floor ruined by damp.

Lastly, check for uneven areas. Use a long level or a straight piece of wood to spot any dips or bumps. Uneven concrete can cause the laminate to shift and create gaps, making your floor look wonky and uneven.

A man preparing a concrete floor for laminate laying.

Found a crack? Fix it with a concrete patching compound. Follow the instructions, fill it in, and smooth it out. For moisture, you might need a dehumidifier or even a concrete sealer to block any dampness from seeping through.

If the floor’s uneven, use a self-leveling compound. Mix it up according to the package directions, pour it over the low spots, and let it flow to create a smooth, level surface. This will make sure your laminate sits perfectly flat, giving you that professional finish.

After making sure the concrete base is sound, you'll want to sweep up all the dust and dirt. Use a vacuum to get into the nooks and crannies. If you’ve got any stubborn stains or grease spots, a bit of soapy water and a scrub brush should do the trick. Make sure the floor is completely dry before moving on.

A clean floor means better adhesion. Dust and debris can create gaps and prevent the laminate from sticking properly.

cork underlay being rolled out on concrete flooring

Why do I need a Concrete Moisture Barrier?

Concrete might seem rock-solid, but it’s actually quite porous. It can absorb moisture from the ground below or even from the air. And trust me, moisture and laminate flooring do not mix. Moisture can cause your laminate to warp, swell, and even develop mold, which is not exactly the stylish look you’re going for.

A moisture barrier will act as a shield, keeping any dampness in the concrete from reaching your laminate. It’s a small step that makes a massive difference in the long-term durability of your laminate. Plastic sheeting, usually around 6 mils thick, and does the job well. It’s affordable and effective, but you’ve got to be precise with the installation to ensure there are no gaps.

A step up from plastic sheeting would be vapor barriers which are designed specifically to block moisture. They’re a bit more robust and often come with added features like built in adhesive strips for easier installation.

  • Measure and cut
    Start by measuring your room and cutting the moisture barrier to size. Make sure you’ve got enough to cover the entire floor, with a bit extra to run up the walls slightly.
  • Lay it out
    Lay the moisture barrier over your concrete floor. If you’re using plastic sheeting or a vapor barrier, make sure the edges overlap by at least 6 inches. This overlap is crucial to prevent any gaps where moisture could sneak through.
  • Seal the edges
    Use a strong adhesive tape to seal the edges of the overlap. This creates a continuous barrier across the entire floor. If you’re using an underlayment with built in moisture protection, follow the manufacturer’s instructions for securing it.
  • Run up the walls
    Let the barrier run up the walls slightly, about 2 to 3 inches. This extra bit ensures that any moisture trying to sneak in from the sides is blocked. You can trim it down once the laminate is installed and the baseboards are in place.
  • Secure it
    Make sure the moisture barrier is flat and secure, with no wrinkles or folds. Smooth it out as you go to ensure a nice, even surface for your laminate flooring.

Installing the Underlay

Adding your underlay is going to reduce noise and giving you a more comfortable floor to walk on. Insulation keeps your feet warm, noise reduction means no more echoing footsteps, and the added comfort is like walking on a cloud compared to bare concrete.

You’ve got a few options to choose from. Standard foam is great for most homes, providing good insulation and noise reduction. You can even knock two steps out with one stone by getting a foam with a moisture barrier already on it. For the eco-conscious and those looking for top-notch comfort, cork underlayment is a solid, albeit pricier, choice. Rubber underlayment is your go-to for heavy traffic areas where we're talking commercial floorings.

Installing underlayment is straightforward. Roll out the underlayment, making sure the edges butt up nicely without overlapping. Trim it to fit the room snugly, secure the seams with adhesive strips or tape, and smooth out any wrinkles. Let the edges run slightly up the walls and trim the excess after the laminate is laid. This ensures a flat, secure base for your new floor, making it warmer, quieter, and more comfortable underfoot.

A man laying laminate planks down on a concrete floor foundation.

Measure your room carefully and plan the layout, making sure to account for expansion gaps around the edges. These gaps let the floor expand and contract without causing any issues.

Start the installation in one corner of the room. Place spacers along the walls to maintain that all-important expansion gap. This ensures your floor has room to breathe and prevents buckling. When installing the planks, snap them together row by row. Begin by laying the first row along the longest wall, clicking each plank into place. Continue this process, staggering the joints for a more natural look and added stability.

Cutting planks to fit around obstacles and edges is crucial. Measure twice and cut once to ensure accuracy. Use a saw to trim the planks, fitting them snugly around door frames, pipes, and other obstacles.

Install trim and molding covering those expansion gaps we left around the edges to give your laminate floor a polished, finished look. Measure your trim pieces carefully, cut them to fit, and nail them into place along the walls and around door frames. This not only hides the gaps but also adds a nice, clean edge to your flooring.

Take a good look around the room. Check for any gaps between planks, loose sections, or other issues that might have cropped up during installation. If you find any problems, make the necessary adjustments now to ensure everything is tight and secure. A thorough inspection now will save you headaches down the line and ensure your floor looks and performs its best.

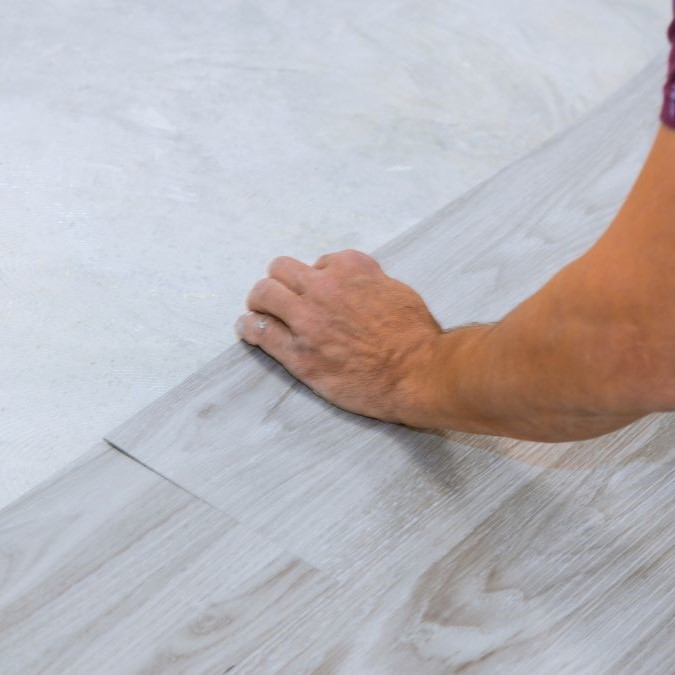
Carefully measure and cut the laminate planks to fit around doorways and obstacles. Use a jigsaw for detailed cuts and ensure there is a small expansion gap around these areas to allow for the flooring's natural expansion and contraction.

An expansion gap is a small space left between the laminate flooring and the walls or any fixed objects. This gap allows the flooring to expand and contract with changes in temperature and humidity, preventing buckling or warping.

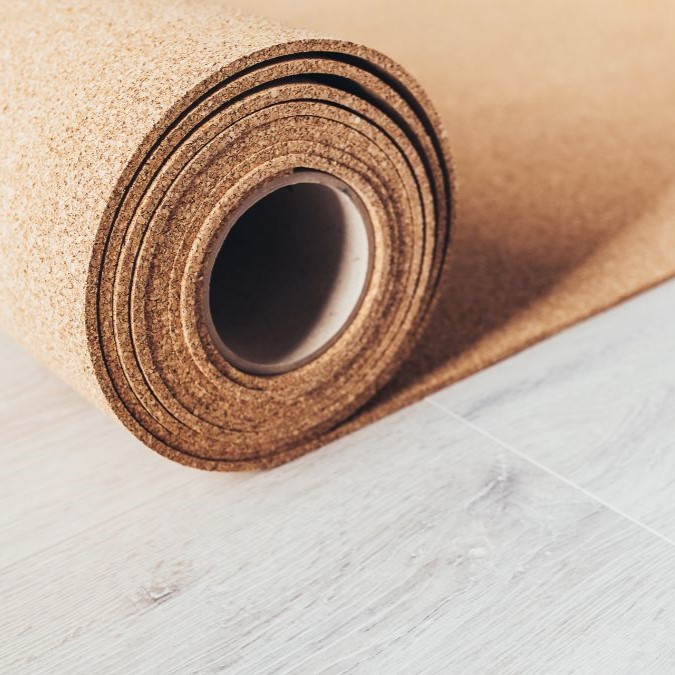
A polyethylene sheet is a popular choice, providing a durable and effective barrier against moisture. This sheet is typically laid directly on the concrete before the underlayment and laminate flooring are installed. Another option is a combination underlayment with an integrated moisture barrier, which simplifies installation by combining soundproofing and moisture protection in one product. Additionally, liquid applied moisture barriers can be used, which involve applying a specialised liquid membrane to the concrete surface that dries to form a protective layer.

When installing laminate flooring on a concrete floor, the underlayment should typically be between 2mm and 3mm thick. This thickness provides a good balance between cushioning and support, ensuring a smooth surface for the laminate while also helping to absorb minor imperfections in the concrete. It also offers soundproofing benefits and provides a moisture barrier to protect the laminate from any residual moisture in the concrete.

Yes, you can install laminate flooring over a concrete floor with in-floor heating. To ensure a successful installation, choose a laminate that is compatible with radiant heating systems. Proper preparation of the concrete surface is crucial; it should be clean, dry, and level. Additionally, you must install a suitable underlayment that is specifically designed for use with heated floors, which will help distribute heat evenly and protect the laminate. Follow the manufacturer's guidelines for both the laminate and the heating system to prevent any potential damage and ensure optimal performance.

Our team of experts is ready to transform your room with precision and craftsmanship. Don't settle for ordinary when you can have exceptional. Contact us now for concrete flooring in the UK by emailing us at info@britishconcretepolishing.co.uk or by filling in the form below and our team will get back to you shortly.